Ranch Dressing… Yes, I’ll have a TON!

I LOVE ranch dressing. A salad isn’t a salad without ranch. A french fry is naked without ranch. Basically, I don’t eat what I eat with ranch because I enjoy it, it is just a way to transport the ranch into my mouth (how silly would I look if I drank ranch straight at a restaurant). In all seriousness, my friends in college used to tell me I should marry the heir to Hidden Valley.

But if you have the same taste for ranch that I do, then you know that you CANNOT buy good bottled ranch.  I thought, I must be missing something at the market. There’s gotta be a bottle I can buy there! So I did a search on the internet and came across this article: http://www.seriouseats.com/2012/05/taste-test-ranch-dressing-what-is-the-best-bottled-ranch-brands.html

Yes, there are some restaurants that have delicious ranch dressing, but how do I get ranch dressing at home, whenever I want it?  There is no bottle that will cure my craving! I decided to make ranch dressing on my own. Yes, I could buy the Hidden Valley packets, but I know I could do better! I had set the bar too high! I spent hours scouring the internet for ranch dressing recipes that intrigued me. Until I decided I trusted the “Utahians” with their ranch dressing expertise.

Apparently BYU has some great tasting ranch. I decided to try it and, Wow! Am I excited!

INGREDIENTS

  • 1/8 C Black Pepper
  • 3/4 C Parsley Flakes
  • 1/4 C Garlic Salt
  • 1 T Kosher Salt
  • 1/8 C Granulated Garlic
  • 3/8 C Granulated Onion
  • 1 T Dill Weed

IMG_1775

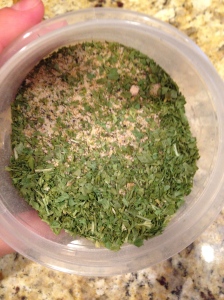
This makes enough mixture to last a while. I am storing it in an airtight container for future ranch cravings!

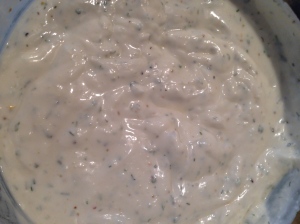
When you are ready for your ranch! Just mix 1 T of the mix with 1 cup each of mayo and buttermilk, 3/4 C sour cream and a spritz of lemon juice. I used a little more than the 1T of the mix because I wanted my ranch to be extra flavorful! Refrigerate for at least 2 hours.

IMG_1774

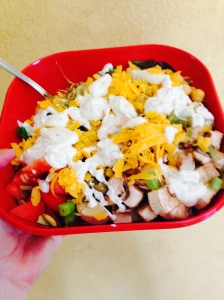
Like I mentioned earlier, I am always trying to find the best way to eat my ranch. So here’s my favorite salad to make at home with my homemade ranch:

INGREDIENTS

  • Mixed greens
  • Tomatoes
  • Alfalfa Sprouts
  • Mushrooms
  • Pumpkin seeds OR Sunflower seeds
  • Freshly grated Cheddar Cheese
  • Green Onions OR Red Onion
  • Garbanzo Beans

IMG_1737


Now that I have talked about ranch, I have a serious craving I need to satisfy!

MG Out!
 

Furniture transformations

If you haven’t heard of Annie Sloan’s Chalk Paint, please remove that rock that you have been living under and come towards the light!! This stuff makes any furniture refinishing project a quick day project! Yes! I said that correctly – you can redo a piece of furniture in about half a day! No sanding/prepping – just start painting. AND the paint dries super fast so coat 2 can happen shortly after the first!!! Afterwards, you put either a dark or light wax (or both) to protect/seal it.

Here is a link to the genius woman’s website: http://www.anniesloan.com/acatalog/paints.html

I started seeing “chalk paint” projects on Pinterest. My mom then told me there was a store very close to us in Orange County and they offer classes. The store is adorable and has all the colors on a wall of chairs. You have to see it to believe it! Here is the link to Peinture in Costa Mesa: http://peinturestudios.com

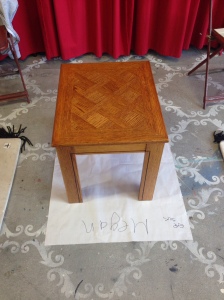
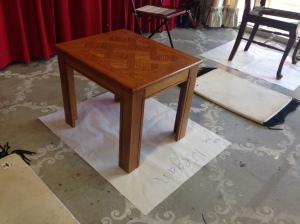
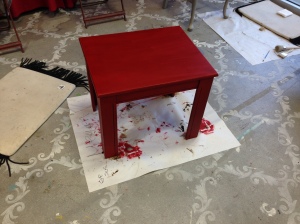
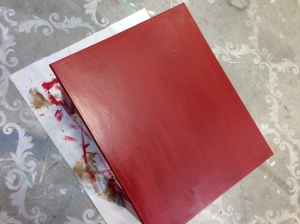
Peinture has classes on Saturdays (2 times a month??). I took the beginning class to get a grasp of how the paints work. You get to bring one smaller piece of furniture to paint in the class as you learn basic technique. I brought a side table Greg bought when he moved into his place. He got it at Goodwill and it needed a miracle since it really wasn’t my style – o, how many pieces of furniture I’ve gotten rid of because I didn’t like the look/color. Anyways, I painted it with Emperor’s Silk. On my second coat, I made sure to pile the paint on to it to cover up the design in the wood. Because I had such a think layer of paint, I had to use a blow dryer to help the paint dry in time. This resulted in some cool cracks in the paint! This was actually an Annie Sloan technique I didn’t know about. I mixed dark and light wax for my top coat.

Before

Before

Before

Before

After

After

After

After

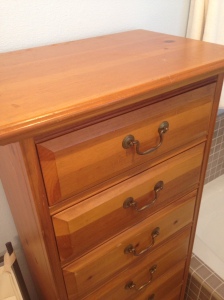
After the class, I had the chalk paint bug! My cousin happened to be getting rid of furniture and I offered to take the orphans into my “workshop.” My next project was a tall oak dresser. I made more work for myself by taking the handles off and filling them with wood putty – I then had to sand that down.  I decided to paint it Old White and distress it so that the oak color could come through. I did 2 coats of the Old White and then clear waxed the entire dresser. I went over most of the dresser’s edges with sandpaper to distress it and bring out the oak color. I then used the dark wax in crevices. I bought some super cute Shabby Chic-esq knobs at Homegoods and my lovely husband helped drill new holes!

Before

Before

Before

Before

After

After

After

After

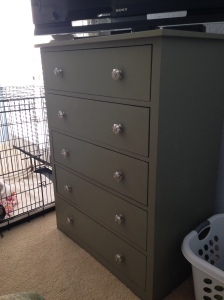
I was on a roll! My favorite project is the dresser in our bedroom! I was SO over it and again, it was a “pre-Meghan” piece that needed some feminine touches (I’m sure Greg was just as excited as I was). I think one of my favorite Annie Sloan colors is Chateau Grey. It is so versatile! Even though the name has “grey” in it, it actually has a beautiful green tint. Again, I removed the handles and filled the holes then sanded that down (Greg helped with the sanding – wow was that a project!). Then I got to work. 2 coats of Chateau Grey, a little sanding to distress, and then clear wax. I want to Homegoods, again for the knobs and VOILA! I had a new dresser in our bedroom!

Before

Before

Before

Before

After

After

After

After

I love transforming furniture! It changes your entire room! With every little change, I make my house a home. I am also slowly making it less of a “bachelor pad.” Greg has much better taste now 🙂

Everything but the Kitchen Sink Spicy Ground Turkey Tacos

Greg and I eat these about once a week. We just can’t get enough! And let me tell you, they are SOOOOOO easy!

Turkey Tacos

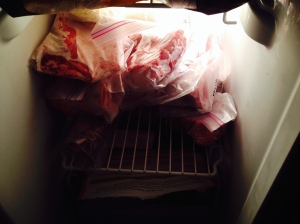
Greg and I make a Costco trip about every other month or even longer. This is where we stock up on all our meat. I buy chicken breasts (6 packets each with 2 large chicken breasts for about $32) and ground turkey (4 large containers for about $18). Sometimes we go crazy and buy lamb chops (6-8 chops for $18). When we get home we divide everything up. The chicken breasts are huge so I slice each one in half to make nice skinny cutlets. In the end we get 1 meal for each chicken breast (12 meals). We divide the ground turkey up but breaking each cartons meat in half. We get 8 meals from the ground turkey.

My freezer full of meat - a month after my last Costco run

My freezer full of meat – a month after my last Costco run

Almost all 8 of those packets of ground turkey go towards these tacos. This is a meal I stole from my mom. She used to make ground beef tacos, but I feel healthier eating it with turkey. I don’t really measure. I season to taste and sight. I’ll try to give measurements as much as possible. This dish can get spicy so season with caution.

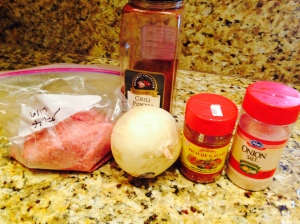
INGREDIENTS

  • Ground turkey
  • 1 White onion
  • 1t Olive Oil
  • 2-4T Chili powder
  • 1-2T El Guapo Hot Pico de Gallo seasoning (I’ve been told this brand is hard to find – I’ve tried others, but this one is the best if you can find it)
  • Onion salt to taste (my mom used this in everything growing up – try in in scrambled eggs or on top of eggs over medium instead of regular salt)
Ingredients for the meat

Ingredients for the meat

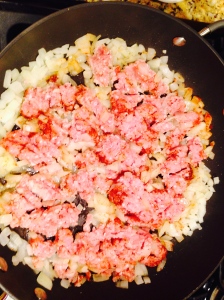
I chop up the entire onion and sauté it with the Olive Oil for a good 2 minutes or so on medium to high heat. Next I add the meat and season with half the measurements of Chili Powder, Pico De Gallo, and Onion Salt. Once I break the meat up and flip it, I season the rest of the way. I like my turkey in pretty small pieces (which helps it cook quicker). I let my meat cook on medium/high for about 10 more minutes stirring occasionally.

Turkey before I add the 2nd round of seasoning

Turkey before I add the 2nd round of seasoning

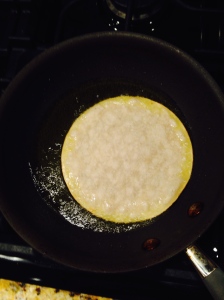
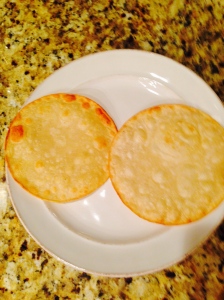
I like to get my tortillas a little crispy in olive oil. Since I am gluten free, we use corn tortillas which fall apart a lot easier than flour. Cooking them in hot Olive Oil helps then stay together so we can load up our tacos with filling. In my smallest pan (big enough to fit a corn tortilla), I pour enough Olive Oil to cover the bottom and turn to high heat. Once the oil is hot, I drop my first tortilla in, flipping it when it starts to get dark. I pat the tortilla in paper towels and repeat until all tortillas are cooked.

Tortilla cooking

Tortilla cooking

Tortillas ready to be topped

Tortillas ready to be topped

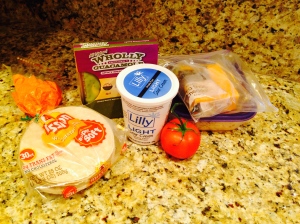
I always make sure I have at least guacamole and cheese for toppings. Those 2 with the meat are perfect – the guacamole cuts the spice of the meat. Sour cream can also be a nice touch or diced up tomato. I love a “kitchen sink” taco so the more the merrier for me. You could also add diced onion or cilantro.

Some toppings you could use

Some toppings you could use

Topped Tacos

Topped Tacos

These are a huge hit in our house especially on those evenings I work late. Did I mention that every night when I cook, Greg does the dishes! What a great husband!
🙂 ENJOY!

Chopped Thai Chicken Salad

Dinner in the Geier house is always an adventure. I love coming up with new things to cook and constantly try new things. Being a TV Producer, my time can be limited – sometimes I am making dinner at 8pm (better than take out, right?). Right now, I am on hiatus or as some of us call it “funemployment!” I am basically in between shows – waiting for the next job opportunity. Meanwhile, I get to enjoy my time at home, be extra creative, and make homemade meals. I also get to exercise my OCD-ness – which can be a good and a bad thing 🙂

Today is a try a new recipe day! Greg asked for a salad so this is what I found on Pintrest. I have never been much of a salad person – I am more interested in the ingredients and toppings than the lettuce itself. I guess you could say I’m a salad snob. I don’t like fruit in my salad – I don’t like just a plain vinaigrette – It needs to be loaded with more than a couple toppings because I want to get full off the toppings since I don’t actually eat much of the lettuce. When I saw this recipe, I thought, “I can make that mine.” I’m all for going off the grid in the kitchen and getting creative. I made a few changes/additions but Pinch of Yum gets the credit for inspiring my own Chopped Thai Chicken Salad.

Here is the link to the Pinch of Yum recipe: http://pinchofyum.com/chopped-thai-chicken-salad

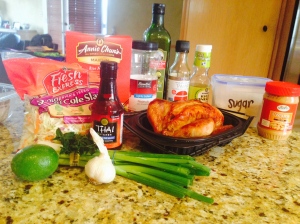
Here’s her ingredients with notes about what I changed:

IMG_1731

All the ingredients ready to be used

Salad
  • 2 boneless skinless chicken breasts (I bought a roasted chicken at the market)
  • 1 small head green or white cabbage (2 cups shredded) (I used a half a bag of coleslaw mix instead)
  • 1 large carrot (1½ cups shredded) (I used a half a bag of coleslaw mix instead)
  • 1 green papaya (1½ cups shredded) (Not a fruit in salad person – I omitted this)
  • ½ cup fresh cilantro (I used mint instead – I am one of those people that cilantro tastes like soap to)
  • ½ cup green onions
  • ½ cup chopped peanuts (Didn’t chop these – I wanted the extra crunch)
  • 1/2 box of Maifun Rice Noodles (Like I mentioned – I like “stuff” in my salad)
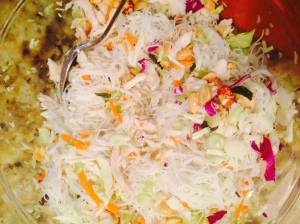
IMG_1733

Here’s all the above ingredients mixed together (including the peanuts). I refrigerated it all together until it was time to dress the salad.

Dressing
  • 2 cloves garlic
  • 3 bird’s eye chili peppers (sub ½ teaspoon minced hot pepper) (I used red chili flakes because I forgot this at the market)
  • 2 tablespoons soy sauce (Gluten free soy sauce for me)
  • 2 tablespoons vinegar (I used rice vinegar)
  • 2 tablespoons sugar
  • 1 tablespoon fresh lime juice (I used juice from half a lime)
  • 1 tablespoon oil (Olive oil – maybe next time I will use Sesame Oil)
  • ½ teaspoon fish sauce
  • ¼ cup peanut butter
  • ¼ cup water (I had some leftover chicken stock I needed to use so I used that instead)
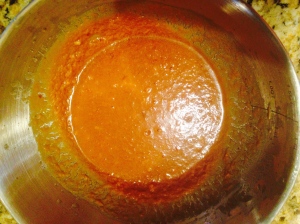
The dressing - not very pretty - but delicious!!!

The dressing – not very pretty but delicious!!!

THE VERDICT

Greg and I loved this salad so much that I will be making it again! It would even be great for a party. The noodles were really long and didn’t separate very easily – maybe next time I will break the noodles in half (at least) before cooking them.

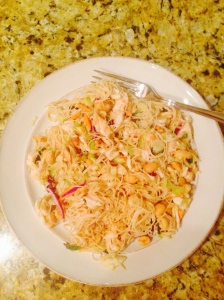
Finished product

Finished product


After Greg and I eat our dinner, we usually each have a cup of Kefir (gotta get our probiotics). Milo also loves his Kefir… http://www.youtube.com/watch?v=1qdTHLLDLFs

🙂 MG out